Replace the Anode Rod on a Heat Pump Water Heater
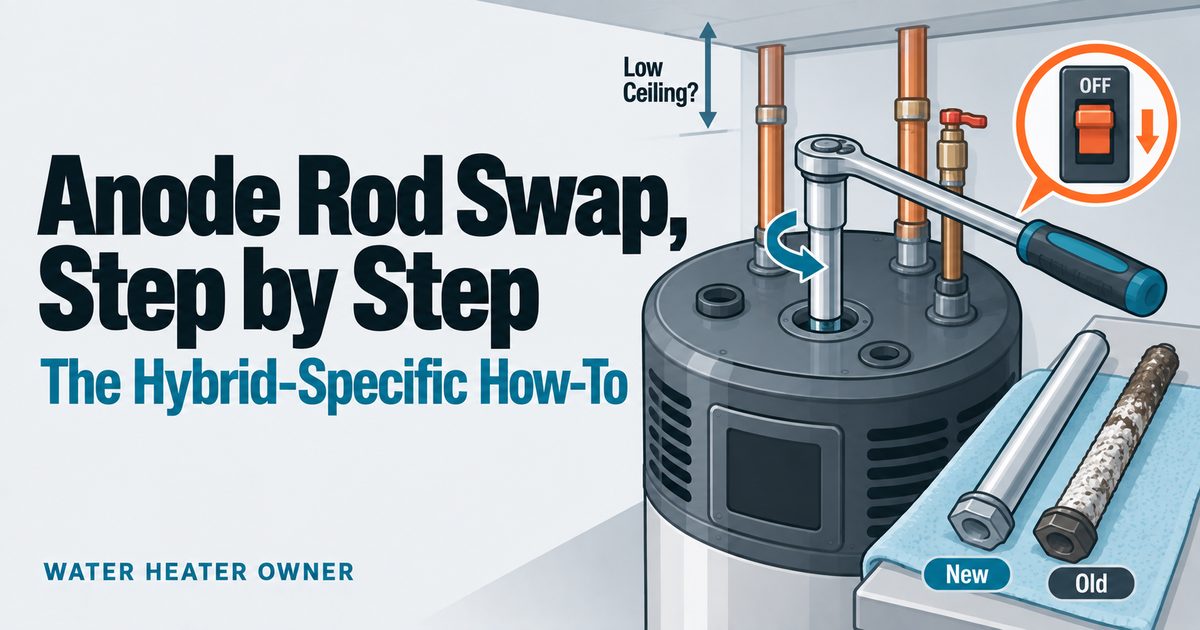
Replacing the anode rod on a heat pump water heater can be a DIY job — if your manufacturer’s manual leaves it to owners, you have headroom above the unit, and the old rod breaks loose. The short version: 1-1/16” deep-well socket, power off at the breaker, let the hot water cool, cold water off, depressurize, swap the rod, then refill and purge air before restoring power. And if you install a powered anode instead of another sacrificial rod, this is the last time you ever do this job.
Where the anode lives on a heat pump water heater
On a standard electric tank, the anode is a plug on the flat top of the tank with open air above it. On a hybrid, the heat pump module is sitting exactly where your swing room used to be — compressor, evaporator, fan, and a shroud covering all of it.
Where the rod actually is varies by model, so check your manual before you buy anything. On A.O. Smith’s PHPT hybrids, the service handbook puts the powered anode inside the heat pump compartment, between the compressor and the evaporator, under the top shroud. Rheem’s Gen V hybrids carry a conventional sacrificial rod, with replacement part numbers in the manual’s parts list. Same lesson either way: on a hybrid, “find the anode” is step zero.
The second hybrid-specific problem is headroom. A full-length rod needs roughly the height of the tank in clear space above the unit to slide out — and hybrids are tall to begin with, often parked under low basement ceilings. If you don’t have the clearance, you’re not stuck: many owners report using a segmented (flexible) anode rod — the same sacrificial metal in short linked sections that snake past a low ceiling. It’s the standard low-headroom workaround.
Inspect or replace?
The manuals I’ve worked from are blunt about one thing — Rheem’s Gen V manual says removing the anode shortens tank life and voids the warranty. On inspection timing they differ: Rheem’s doesn’t give owners a schedule, while A.O. Smith’s 2019 Voltex manual says to inspect the rod after the first six months and at least annually after that — and more often on softened water, which it says depletes the rod faster. Many owners on other brands report checking every 1–3 years; your own manual’s schedule wins.
What you’re looking for when you pull it: a healthy rod is a solid cylinder of gray metal. A spent one is pitted down to a bare steel core wire, sometimes with chalky mineral crust. The common-sense threshold most owners use: if you’re seeing more core wire than anode metal, it’s done — replace it.
One important fork before you buy anything: if the reason you’re here is rotten-egg smelling hot water, that’s not a wear problem — it’s a material decision (magnesium vs aluminum/zinc vs powered), and I’ve covered that whole decision separately in the rotten egg smell guide. This article is the wrench work; that one tells you which rod to put in.
Step by step
Check who your manufacturer says should do this job before you start. GE’s GeoSpring guide says a qualified servicer or plumber should do the anode replacement. Rheem’s manual tells owners not to repair or replace any part it doesn’t specifically recommend, and it doesn’t walk owners through an anode swap. A.O. Smith’s 2019 manual includes anode inspection in its owner maintenance, with a qualified person as the alternative. If your manual doesn’t cover it, or you’re unsure, hand it to a plumber.
Tools and parts: the replacement rod (or powered anode), a 1-1/16” six-point deep-well socket, a breaker bar or long ratchet, thread sealant or PTFE tape, a garden hose, and ideally a torque wrench. The socket size and the torque figure below come from A.O. Smith’s service handbook for its PHPT hybrid platform — check your own model’s manual, because these are that platform’s numbers.
- Kill power at the breaker. Not standby on the display — the breaker. You’re about to work on top of a 208–240 V appliance. Then run a hot tap until the water is no longer hot, so you’re not draining scalding water.
- Close the cold inlet valve on the pipe feeding the tank.
- Depressurize and drop the water level. Open a hot tap somewhere in the house, then connect a hose to the drain valve and drain a few gallons — enough to bring the water level below the anode port. You don’t need to empty the tank (more on that in the FAQ). Keep everyone clear of the drain discharge, and don’t use the T&P valve as your working drain — it’s a safety device.
- Clear your access. On some models that means popping a small cover; on others (the PHPT layout, for instance) the top shroud has to come off, and on that platform the handbook has you disconnect display ribbon cables to do it. If getting to the rod means unplugging wiring you can’t confidently put back, this is a fine moment to hand the job to a plumber.
- Break the rod loose. Socket, breaker bar, steady pressure — and a helper bracing the tank, because factory-torqued rods fight back and a twisting tank stresses your water connections. Stuck solid? See the next section before you do anything heroic.
- Pull the old rod, prep the new one. Slide the old rod out, then put thread sealant or PTFE tape on the new rod’s threads — on the threads only, not smeared down the rod.
- Install and torque. Thread it in by hand first, then tighten. The PHPT handbook specifies 50 lb-ft — one more reason a torque wrench is worth borrowing, because “good and tight” by feel is exactly how rods end up either weeping at the threads or immovable in three years. That number is that platform’s spec; check yours.
- Refill and purge BEFORE restoring power. Open the cold inlet, then run hot taps until water flows with no sputtering air. This order is not optional: powering a partially filled tank dry-fires the electric elements. It’s such a classic mistake that Rheem’s hybrids have a dedicated alarm for it (A008 — fill the tank and purge air), and the PHPT units run their own dry-fire protection check for the same reason.
- Restore power and let it settle. Expect the unit to run self-checks before heating; if it beeps or throws an alarm on restart, decode it before panicking — the beeping guide covers what each one means. In the days after, glance under the unit: a damp ring at the anode port means the seal isn’t right, and water under a hybrid always deserves a look.
While the top of the unit is open, it’s also the two-minute moment to clean the air filter.
The stuck anode problem
Factory rods on older tanks can be genuinely welded in place by corrosion and mineral scale, and this is where most DIY attempts die. The escalation ladder owners consistently report:
- Penetrating oil and patience. Soak the threads, wait, try again.
- More leverage, plus a helper. A breaker bar with a second person bracing the tank. What you’re guarding against is the whole tank twisting — that’s how rigid plumbing connections crack.
- An impact wrench. The most-reported unsticker by far: the hammering action breaks corrosion bonds that steady pull can’t, without putting sustained twist through the tank.
And the honest stopping point: if penetrating oil plus an impact wrench won’t move it, stop and call a plumber. Adding a longer cheater pipe to a plumbed-in, glass-lined tank in a tight closet is how a $30 maintenance job becomes a burst fitting. A plumber does this routinely, has the tools, and if something lets go, it lets go on their watch.
Going powered instead
If you’re already doing this job, it’s worth deciding whether to make it the last time. A powered anode replaces the sacrificial rod with an electrically driven titanium rod that doesn’t deplete — the full why-and-which is in the rotten egg smell guide. Some units ship with one from the factory (the PHPT platform does; its parts list even gives platform-specific rods — 3 mm for 80-gallon, 2 mm for 60-gallon — numbers that belong to that platform only). For tanks with a conventional rod, the best-known aftermarket option is the Corro-Protec.
Installation is the same wrench work plus a wire, but three things change, per the PHPT service handbook (check your product’s instructions):
- It needs power, always. A powered anode only protects the tank while energized — don’t leave the unit unpowered for extended periods, and if you must, drain the tank to minimize corrosion.
- Be patient at startup. On that platform, the unit runs a dry-fire check of about 8 minutes before heating, and an anode fault can take up to 70 minutes to reappear — watch the display that long before calling the install good.
- No depletion, no routine swaps. That’s the whole point — though the control or the rod can still malfunction, and A.O. Smith’s 2012 Voltex manual says a malfunctioning powered anode should be replaced by a qualified technician.
FAQ
What size socket for the anode rod? A 1-1/16” six-point deep-well socket is what A.O. Smith’s hybrid service handbook specifies, and it’s the size owners report across most residential tanks. Verify against your own manual before buying — and get six-point, not twelve: a stuck rod will round off a twelve-point socket’s grip.
Do I have to drain the whole tank? Usually not. The rod enters near the top, so you only need the water level below the port — many owners report a few gallons out the drain valve is plenty. A full drain only makes sense if you’re flushing sediment anyway.
How tight should the new rod be? The PHPT service handbook says 50 lb-ft — snug enough not to weep, not gorilla-tight. That’s one platform’s published spec, so check your model’s manual — a torque wrench beats guessing in both directions.
Can I just remove the anode and not put one back? No. The anode corrodes instead of your tank’s steel — run without one and the tank rusts from the inside, and Rheem’s manual says removing it voids the warranty. If the rod itself is causing trouble (smell, repeated depletion), change the type of anode, not its existence — here’s how to choose.

Dan Mercer — Dan Mercer is the pen name of Water Heater Owner’s editor. I’m not a licensed plumber or electrician, and I don’t sell or install water heaters. Every guide here starts from the manufacturers’ manuals and technical bulletins, is cross-checked against what owners consistently report, and says which is which — including what you can safely check yourself and when it’s a job for a licensed plumber or electrician.